Thursday, February 21, 2019

A Couple of Rules Reviews - A View of the Disunited Kingdom and The Zone

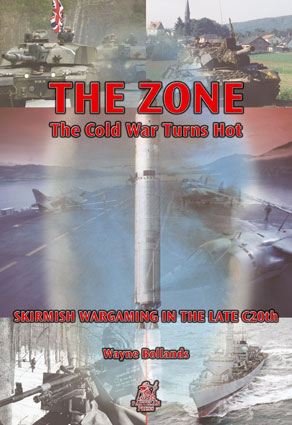
The Zone
Taken from the Miniatures Page

Skirmish Wargaming in the Late C20th Century
Written by Wayne Bollands
ISBN: 978-1-85818-758-7
56 pages
Paperback
$29.00 from On Military Matters

A new "Cold War Gone Hot" rules set has hit the market, and I've gotten an chance to take a look at it. The only reference to the novel series is that shares the name, and something of the premise, but no hovercraft or hard as nails snipers to be found here! It's a shame, because that series was very, very gameable, both from a RPG and wargaming perspective. The production quality was fairly good, and I was pretty chuffed with it when I first got it, but there were some issues. 

First, I wasn't too happy that some of the gear mentioned in the squad organizations was not stated out in the game. Granted, an M113 is probably very much like an FV-432 in game terms, but it's really kind of phoned in IMO, or one size fits all ATGM?!

You can tell it's descended from "Living on the Frontline", which is a plus, (with some minor but needed changes to activation) and the game's system is very, very similar, if not identical, especially when the game mentions you can even resolve thrown bricks! (Something tells me the Soviet and East German views on suppressing rioting West Germans would be very different from, oh , say, the British in Northern Ireland). Again, my issues are more with what is missing, than what is present.

All in all, I got the feeling they took "Living on the Frontline", ported some elements over to make it more "Cold War Gone Hot" and then printed it. Like that recipe you taste and say, "it's good, but it just needs something." That said, the production values are nice, with gorgeous photos and readable text throughout. The system is solid, and very easy in execution, one wishes there was a bit more here.

Sorry gang, but I have to give this one 3 out of 5 Mushroom clouds. It's not bad, but it could be a lot better.

Authors Note: Wayne Bollands reached out on Facebook and pointed out some cogent points that I may not have elucidated enough on in my initial review. His comparison to Force On Force and derived rules is fair, and I would certainly take that under advisement. As a point being made that there are future supplements coming. I do look forward to seeing those.

We do try to be fair in our reviews at "500 Miles.." and we hope this note of clarification helps better explain the rating "The Zone" got.
Taken from the Miniatures Page

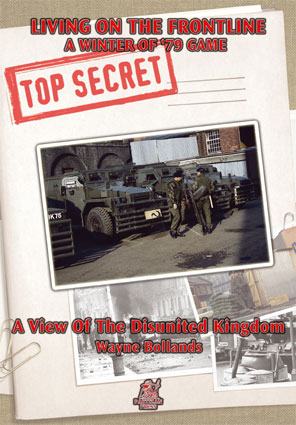
Living on the Frontline – Winter of 79: A View of the Disunited Kingdom
Wayne Bollands
ISBN: 978-1-85818-715-0
48 pages
Paperback
$29.00 from On Military Matters

This is a supplement for "Living on the Frontline" that thrashes out a potential scenario for a "Winter of '79" style "British Civil War". I really liked this book. For a Twilight: 2000 head like me, this is a really good alternate campaign idea and you can use this for a variety of ideas to set a campaign in a post-apocalyptic UK. It's certainly better than SGUK turned out to be, eh?

The book is in full color, and it's got a lot of nice one paragraph writeups of all of the various factions, including flags (which I suppose you could make flags for the various factions if you were so inclined?). I thought the product was solid, and it comes with additional rules for cavalry (riot cops on horseback anyone, or perhaps something more...basic, armed TA on horseback?)

It's also got nine scenarios, and I was very, very happy to see the variety of scenarios available, all of them easily adapted to the Twilight: 2000 milieu. The production values were solid, and I was happy with the ideas behind the scenario laid out in the book as a means to further putting troops on the table, or even role playing? All in all, this is a good purchase, and I would recommend it. 4 out of 5 mushroom clouds here. 

Monday, February 4, 2019

A New-ish Blog for T2K and Why It Deserves Your Attention!

Ok folks,
 Deep thought time. I found this new blog, The Savant's Rants, and some of the stuff on this site is phenomenal to say the least. I was especially taken by the articles on starvation and food in Twilight: 2000, as well as foraging..but one article is of great importance to miniatures players, at least from an army construction point of view. It's entitled "Crossrant: Feeding the Horde (Armies and Starvation in Twilight: 2000)"

 In short, the article is brilliant. and it explains well that there is an upper limit on the size of armies in Twilight: 2000, because well, you have to feed them. And worse, how much you're gonna short the locals to do just that.

  So what does that leave us? New fodder for scenarios of course! A couple that rapidly come to mind are:
  • An "organized" military force is travelling through a relatively fertile area relatively untouched by the war. The locals aren't too keen on having an extra few thousand mouths to feed and are willing to make life miserable for this force. (Campaign fodder if I ever saw it).
  • A force is sent by one side to raid another side's farms, and take as much as possible, and burn the rest.
  • An enemy force has had amazing crop yields, find out why, and either steal it..or destroy it and make sure they can't have it either?
And these are just a few ideas that come to mind at 8AM on a Monday. I am sure more will hit me as time goes on. But this is what I mean, food for thought is great scenario fodder, and this blog article is no exception. Give it a read, and see if you don't get your own ideas?

Tuesday, January 22, 2019

Trumpeter 1/72 scale Russian BTR-80 (review)

Welcome again gentle reader to another post apocalyptic edition of "It's 500 Miles to the German border"

In this installment we will be looking at Trumpeter's 1/72 scale BTR-80 kit.

Trumpeter's quality so far has worked out very well,  with excellent detailing, and ease of assembly. Most of the parts in their kits fit very well with good overall sculpts. The instructions are pretty easy to follow with minor vagaries in comparison to say Revell (which feels more like Lego instructions).

This model I would say is "deceptively simple". As easy as it was, it was just as easy through my own ineptitude to frick it up.

Putting together the wheels:
The rubber tires and hubs easy- fitting the wheel assembly to the axles was a little trickier. Next time, I should try dry fitting not gluing then sticking on like I did. I wound up twisiting on of the wheels right off and it was a bit of a pain getting it filed and lined up right to go back on. Maybe a bit of work with a knife or pin vise to hollow out the inside before fitting might have helped with the fit.

Pro Tip- always dry fit before gluing. Another point on suspension- its a two parter on this model, avoid rushing through it. Make sure it fits together properly then glue with a "thin cement". Even though you could do this model in record time it helps to take the time to ensure it gets done well.
The instructions would have you add all of the components to the top of the hull after doing the undercarriage, and THEN putting both halves together. 

That's never worked out for my clumsy fingers in the past and wound up snapping off little pieces everywhere.

On this one I would recommend putting the hull together then going for all of the extra bits and bobs.

The light assemblies on the forward deck where a nice touch and came in three parts and was very detailed. Again dry fit then glue. The rest was pretty much straightforward. I would, of course, reference real life pics of the BTR-80 just to make sure I had it right.

Painting: I didn't go above and beyond in this one and pretty much stuck to the standard script- prime, dry brush white for details then pick a cam scheme and go for it. I did go back over the cam scheme with lighter shades of the same colours to make it stick out a bit more (the irony is not lost on me lol).

At this point I decided to use the decals from the kit as in this case I thought it would add to a model that doesn't really have a lot of room for stowage and modifications.

Other than that after decals placed and dried I went with inking and weathering using some mud and dust effects etc.

In the end, its a good model with good representation and ease of assembly and should be a fine edition to anyone's gaming table or display shelf.

Thanks for tuning in.

Sincerely, Evil von Scary 


Sunday, January 20, 2019

Dressing For The Apocalypse - 28mm: more Soviets

Empress miniatures (as mentioned in a previous post) has a small range of figures for the Chechnya conflict. You do have to be careful, as the figures are a bit variable in size.

These three figures are from CWR007 "Russians Fighting".


Other figures by Empress, such as the Insurgents are useful. This is the PK GPMG figure from the INS03 set that is useable.
This figure is based on the illustration of a South Ossetian Irregular in the Osprey publication "Elite 197: Russian Security and Paramilitary Forces since 1991".

Dressing For The Apocalypse - 28mm: British Army

Currently Under Fire Miniatures have a range of Cold War figures comprising Soviets, East Germans, West Germans (police and army) and US. Unfortunately there are (currently) no plans for adding British figures to their range (but there is a possibility of a compatible range from another manufacturer).

In the meantime, I want a set of figures representing British infantry that are a nice match with the Under Fire and Empress figures that I currently own.

Luckily, I have a number of figures from Crooked Dice that will fit the bill.

Crooked Dice publish the 7TV skirmish rule set designed for games based on the film and television output of a fictional British production company (and their American subsidiary). They have a matching set of figures for a number of their productions.

There are two main ranges that will be the source for my British infantry.

The first is their Army figures.
This is one of their Army Privates with Rifles.
The figures are supplied with tabs and (25mm diameter) slot bases. In this case I cut off the tabs, filed the soles of the boots flat and drilled, pinned and superglued it to a 25mm diameter Renedra plastic base.

He is armed with an L1A1 FN SLR battle rifle. The range also includes figures with Sterling SMGs, a recoiless rifle and a medium machine gun.

The rifle is a bit anachronistic, as by the time of Twilight 2000, the standard British infantry weapon was the L85 (SA80) assault rifle. However, when the original weapon was issued, there were a number of significant issues with it, and it was not until its first use in infantry combat in the 21st century were they fully overcome. For Twilight 2000 purposes, the UK would still have a stock of L1A1s, so they may have been issued to units.

I do have a pack of Hasslefree miniatures L85 rifles that I may try and use as a replacement of the L1A1s. I also might try changing the heads to ones with helmets.

The second is their Department X range.

This is one of the X-Commandos from the X-Commandos 1 pack. They are supplied with a head with a beret. I used one of Empress Miniatures British helmets with extra camouflage (BRIT13).

The figure has rather bulky body armour, similar to that seen in use in that period.

To base the figure, I used a Warlord lipped 25mm base and added a couple of strips of plastic card to make a slot for the cut down tab on the figures feet.

I added a Warlord British Commando rucksack on the back.
Greenstuff was used to add straps and a scarf.

Here it is painted with a Woodland DPM pattern.


Dressing For The Apocalypse - 28mm: Bundeswehr

As mentioned earlier, Under Fire Miniatures do a range of Cold War period 28mm figures.

I bought a set each of Soviets, East German (NVA) and West German (Bundeswehr).

Having assembled (converted) and painted the Soviets, I started on the West German infantry.

This is Bundeswehr pack 1, comprising four infantry armed with G3 battle rifles.


For my use I used Renedra 25mm round bases. I drill a 1mm hole in the figure base and a matching hole in the round base and use a piece of 1mm Evergreen rod to pin the two together and then glue it with superglue. Milliput is then used to smooth the two together.

There was then the decision as to what colour to paint them.

For my reference, I had a look at a contemporary Osprey book "Nato Armies Today".
I also  had the Tankograd book on "Bold Sparrow '87".
I decided to go for the simple grey green colour scheme (I have Flecktarn to look forward to on the Empress modern Bundeswehr).

The figures were undercoated black with Citadel Chaos Black followed by PSC German Field Grey.

The webbing and packs are Vallejo USA Olive Drab.

The figures were dry brushed with Citadel Dry Nurgling Green.

The figures were then shaded with Citadel Athonian Camoshade (it came out a bit shiny so I used some Humbrol 49 acrylic varnish).


Group shot.
I have an Empress Miniatures M113 APC which is undergoing conversion to an M113G to provide them with some mobility.

Wednesday, January 16, 2019

Academy 1/72 Modified HEMTT With Custom Made Cargo and Tarp - By Evil Von Scary

Academy 1/72 Modified HEMTT with custom made cargo and tarp

Hi again folks.
My latest project for Twilight 2000 is a modified 1/72 scale HEMTT. Lots of attention gets paid to the frontline combat vehicles in modelling but just as important are the logistics vehicles that get the fuel, parts, ammunition, food and water to those units.

Academy has a good grip on quality control and so far Ive been really happy with their quality (in 1/72 scale) and the price is usually within most modellers budgets.

Now on to the model. Through and unfortunate incident involving house pets a BTR-70 was destroyed so I gathered the parts that I could find and those went into the extra box. The turret is from that incident.

Overall the model was easy to put together and the parts were well detailed and the instructions very straight forward. There was minimal fuss getting everything to fit together. I added some ad hoc armor using polystyrene (.040 thickness) and cut to shape.

 I tried something a bit different painting wise and started with a very darkish red/brown paint
as a base (instead of primer black). I wanted a very rusted out look with this one. Also wanted to try something with cargo and making a tarp.Mostly painted the base model with a very rusted out look then used a Tamiya olive drab paint over the model allowing the rust to show through. Inks and weathering for greater effect is helpful.

The cargo was from some oil drums I had in spare parts, modelling clay and an old usb stick cap. It rested on a piece of egg carton, measured and cut out before hand to ensure it would all fit into the truck bed. Also by doing this separately from the model it allows for other mods and makes sure all the gear fits comfortably. 


The modeling clay was put into a rough shape resembling a bundle of gear. The tarp was tissue paper (from an old gift bag), cut to shape then soaked in a 50/50 solution of white glue and warm water. Laid out onto wax paper, carefully smoothing out excess moisture and glue. Place over the cargo carefully while still most and allow to dry. My first attempt ripped but the second one worked out. Allow to dry. Then paint with a base darker green color and build up details with progressivly lighter greens and finally a dry brush with a darker yellow. Use inks to  highlight folds and creases and do a few dabs of weathering (mud, dust,etc) to make it stand out better.


The tarp and cargo for me stole the show on this build and was a first for me trying this tissue paper technique and Im pretty happy with the results and will be using this quite a bit in the future.

Thanks for tuning in!


Featured Post

Twilight 2000, The Look on the Tabletop, Part 1, Vehicles

Twilight: 2000 is in some ways, a unique post-apocalyptic experience, it isn't quite Mad Max, it isn't quite Gamma World, or for tha...